
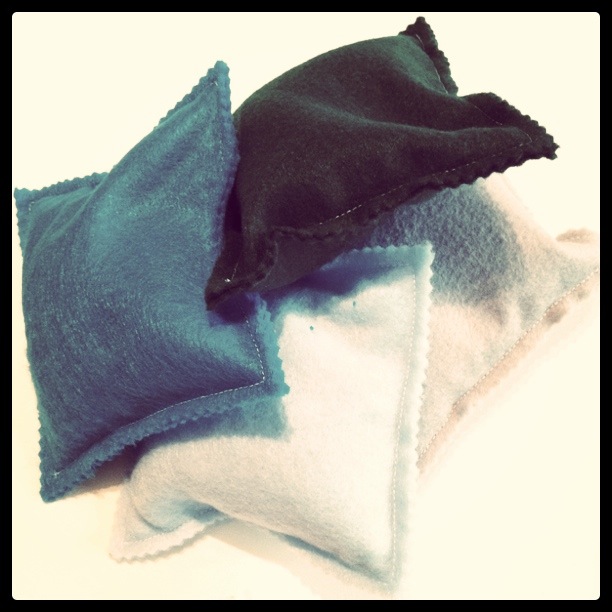
With the mornings getting a notch frostier every day, I think our days of kicking a football around the garden this year are numbered. And while I'm overflowing with cosy, crafty indoor activity ideas for the colder months, my three year old boy still has enough energy to fuel a small tractor - and no amount of cutting and sticking and baking and story reading will sufficiently exert that energy. I draw the line at the football in the house so I thought that soft, unbouncy beanbags would be just the thing to throw around without causing too much havoc, improve my toddler's hand-eye coordination, and most importantly, wear him out!
This is such a quick project, taking only about half an hour, and the child in your life will love being entrusted with the most important job - pouring in the beans!

You Will Need:
4 x A4 sheets of felt in different colours (or enough felt/thick cotton to cut 8 x 15cm squares)
a rotary cutter or scissors
a ruler
dried beans
pinking shears

Measure and cut out 8 squares 15 x 15cm, 2 of each colour (or you could contrast the front and back).

Using a short stitch, join 2 squares together by stitching 15mm from the edges, remembering to leave an opening big enough to pour in the beans.

Get your helper to spoon in the dried beans through the opening until you have a full and squishy (but not bursting) pouch.
Stitch the opening closed, and trim off the excess edges with pinking shears.
No comments:
Post a Comment
I love hearing your thoughts, and if you have any questions at all, I will reply to them within these comments - so please be sure to check back to get your answer!